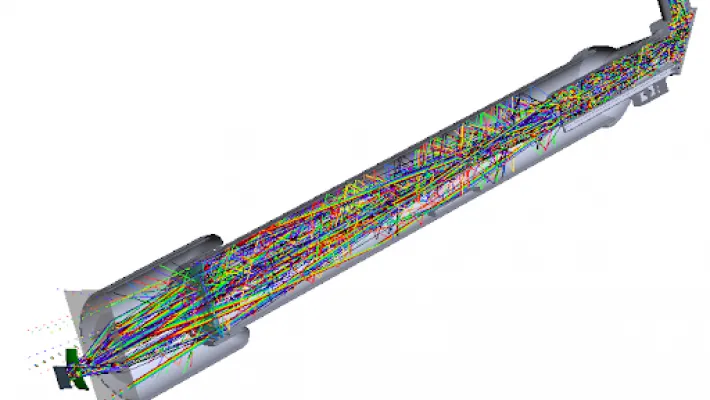
Stray Light Analysis Part 2
Stray Light Analysis Part 2
In part one of our stray light blog we discussed some of the great tools FRED has to calculate and make sense of the stray light in a system. However, it's not all about calculations, the user interface also plays a large part in how FRED excels at handling complex opto-mechanical systems.
Working with Complex Optical Systems
One of the challenges in stray light analysis is applying and keeping track of all the optics, mechanics, and various surface finishes in the form of coating and scattering functions. As a stray light model is iterated, optical coatings and surface definitions may need to be refined for a system containing many surfaces and parts, and models can become complex very quickly.
FRED's user interface has been designed to help cut down on this complexity.
- FRED's CAD Object Tree definition allows the convenient collection of optics and mechanics in assemblies and sub-assemblies which can be expanded or collapsed as desired.
- FRED makes it simple to refine the properties applied to surfaces via several methods including the drag and drop interface, the Assign pop-up menu item, and the Edit/View All Surfaces table.
- Keywords allow for unconstrained tagging of objects, surfaces, assemblies, and sub-assemblies. Once objects are tagged with a keyword, all the necessary properties, and subsequent refinements can be applied to the keyword and cascade to all tagged items.
- FRED's isolation feature allows a fast and simple method to focus on objects of interest by temporarily removing other items from view in just a few clicks.
CAD-Based Object Tree
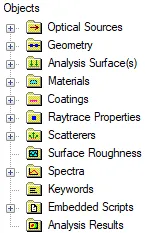
FRED's Object Tree neatly sorts the optical system into several easier-to-manage folders for sources, geometry, analysis/detectors, materials, and more:
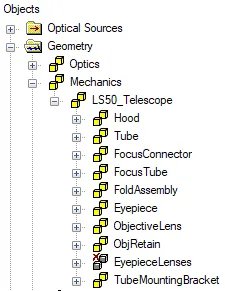
The geometry folder can contain sub-assemblies which can be expanded and collapsed to show as much or as little detail as is required at any stage. For instance, the geometry could be grouped into two sub-assemblies, one for optics and another for mechanics, while the mechanics folder can itself contain additional sub-assemblies:
The mechanical components can then be seen in a cutaway view of the telescope:
Easily Refine Properties
FRED provides several approaches to changing the optical properties of surfaces.
Drag and Drop
To change an optical property on a single surface, the simplest approach is to use drag and drop. For example, to change the coating on Surface 1 from "QW MgF2" to "2 Layer AR", we simply click the "2 Layer AR" coating entry, drag it onto Surface 1, and release the mouse button. The new coating is then applied.
Drag and drop also works on sub-assemblies and applies the property to everything contained within the sub-assembly.
Assign Pop-Up Menu Option
When coatings and raytrace properties need to be changed at the same time for a single surface or a small subset of surfaces, the Assign pop-up menu option can be used. For example, to change four optical surfaces so they use both the "2 Layer AR" coating and the "Allow All" raytrace control, we simply select the coating, raytrace control, and surfaces of interest (holding the CTRL key to multi-select), then right-click to open the pop-up menu and assign those properties to the selected surfaces.
Multiple Surface Table
When large numbers of surfaces need to be edited at once, or when a general overview of the optical properties currently in use is needed, it is more efficient to use the Multiple Surface View/Edit table. This is accessed from Edit and then "Edit / View All Surfaces". In this table we can view or change properties for any number of surfaces, up to and including the entire list of surfaces.
Inside the Multiple Surface table we can filter the surface list based on whether a surface is currently selected, traceable, or isolated, and sort rows from the column headers before selecting any number of rows to edit.
Keywords
In our simple telescope example the optics and mechanics are already separated into two sub-assemblies, but even with this level of grouping in place the mechanical parts do not all have the same optical finish. How can we keep control over which properties are used on which components? In this situation, keywords can be used to impose some order.
Keywords facilitate complex model construction and configuration by acting as pass-throughs for objects that have been assigned a keyword. This property type adds an additional level of organization and control on top of the basic hierarchy provided by the Object Tree itself. In this case, the mechanics need two different surface finishes: "Glossy Black Plastic" and "Black Anodized Aluminium".
Using keywords makes it simpler to group items by a shared characteristic and then apply changes to the keyword so they propagate down to all tagged items. Note that items can have more than one keyword.
Easily View Sub-Components Within the Model
When working with a complex model, it can be helpful to temporarily strip back some of that complexity in order to view only a subset of optical surfaces or mechanical parts, or perhaps to select a few of them for use with the 'Selected Surfaces' filter of the Multiple Surface table described earlier. FRED's isolation feature was made for this purpose.
Isolation does not only work on single pieces of geometry. As shown in the figure below, it can be invoked on groups of surfaces, assemblies, coatings, raytrace controls, and keywords.
Summary
FRED's UI was created and optimized by stray light experts to make it simpler to work with complex opto-mechanical systems during stray light analysis.
Contact us to request a demo of FRED or to discuss your application requirements in more detail.